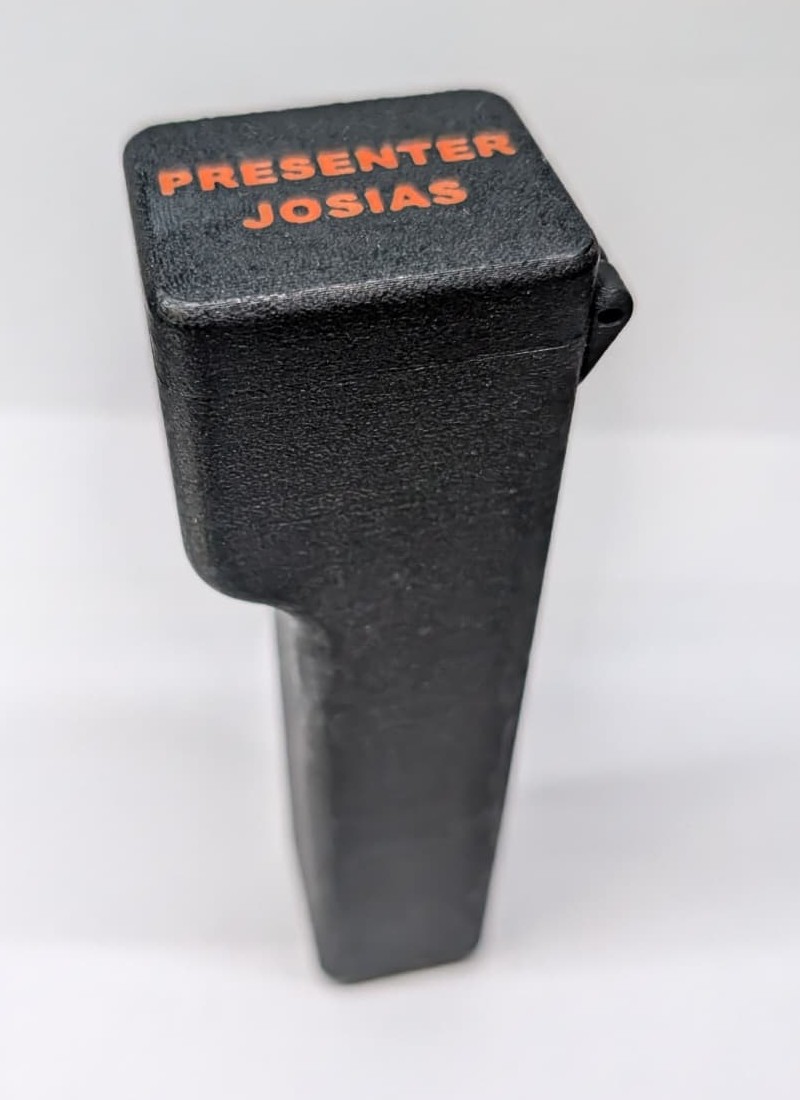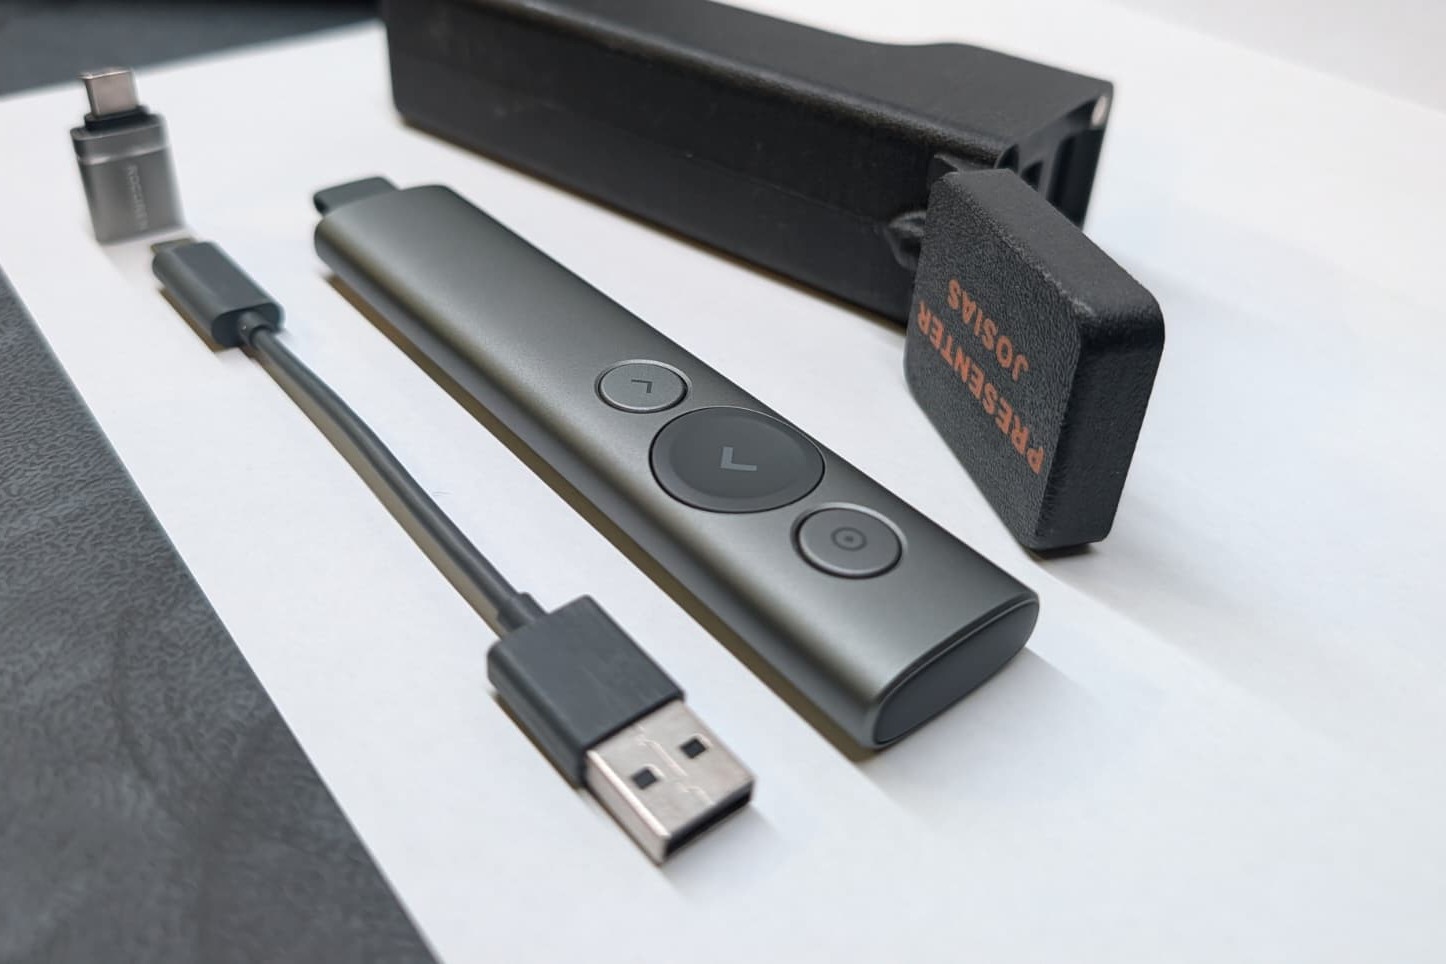
Back in school I got a Logitech Spotlight presenter. Over time, however, I noticed that I rarely had it with me. The presenter was quite expensive, so I did not want to just toss it loose into my backpack.
I wanted to change that and designed a matching case. While I was at it, the case should also offer a place for the accessories I otherwise always have to search for: a USB C to USB A adapter for laptops without a USB A port and a short USB A to USB C charging cable.
Design
Everything has its place
I designed the whole case in Fusion 360. It was important to me that all parts print well on a normal FDM 3D printer without supports. The case consists of two printed parts: the body and the lid.
The presenter slides into the long, narrow shaft of the body. The wider head above it has separate slots for the adapter and the plug of the charging cable. When you flip the lid open, everything sits right next to each other, ready to grab.
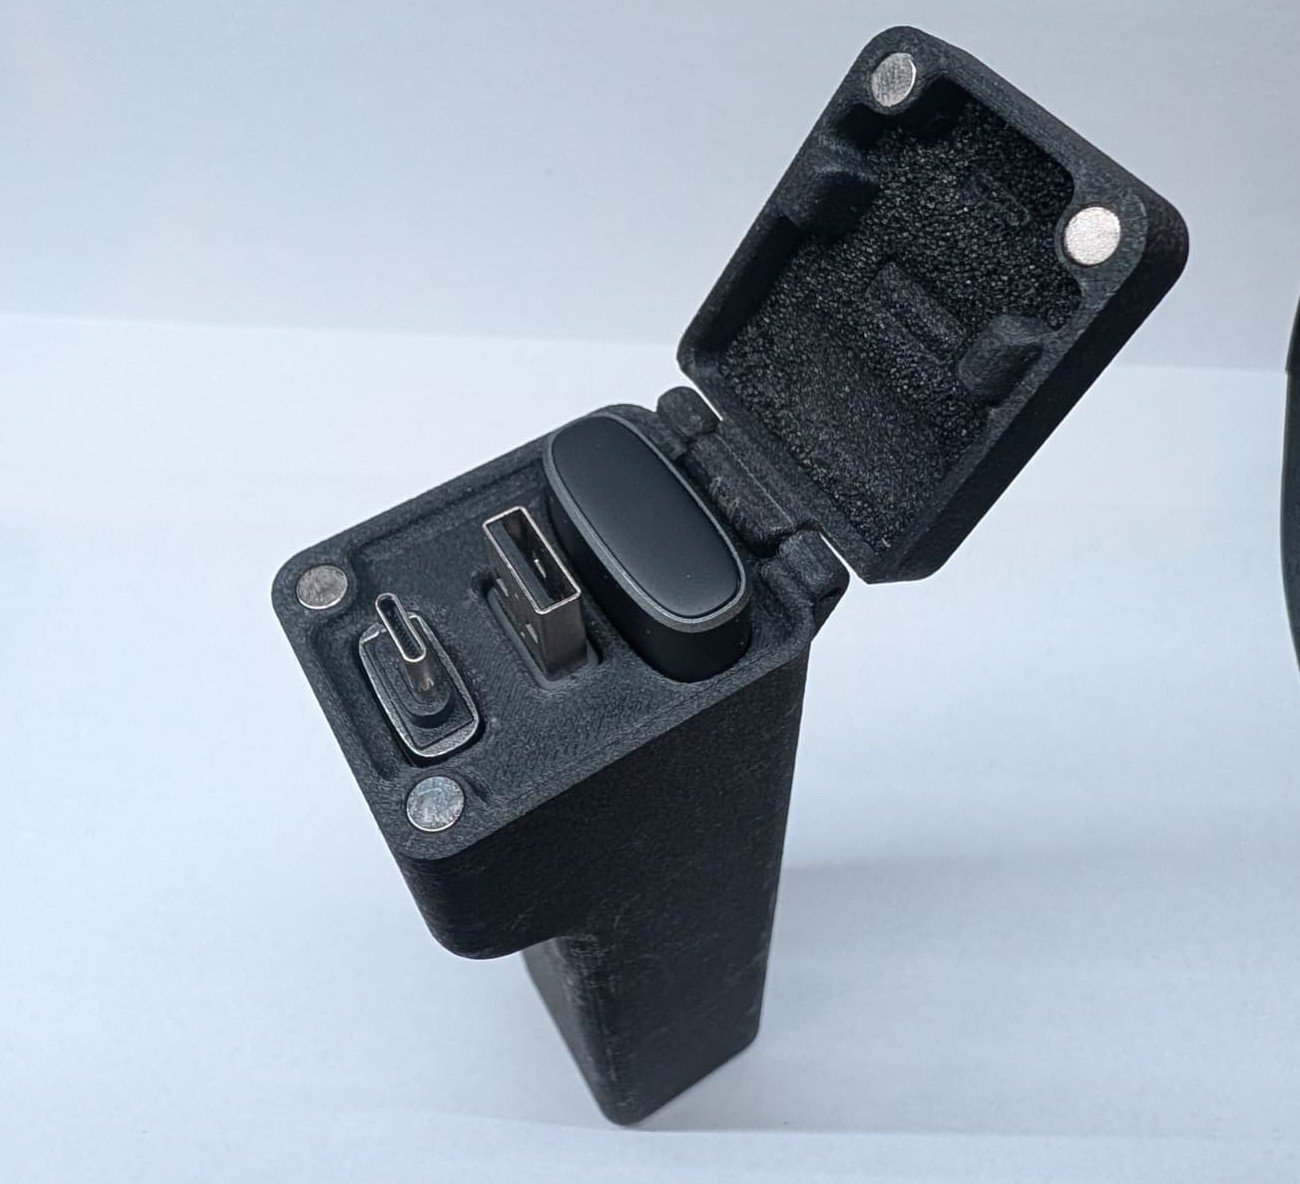
So that the lid opens cleanly, it rotates around an axle made from a 2 mm × 25 mm stainless steel dowel pin. In addition there is a small ball spring plunger that acts as a spring pin to hold the lid in place. Apart from the magnets, these two are the only components that do not come out of the printer.
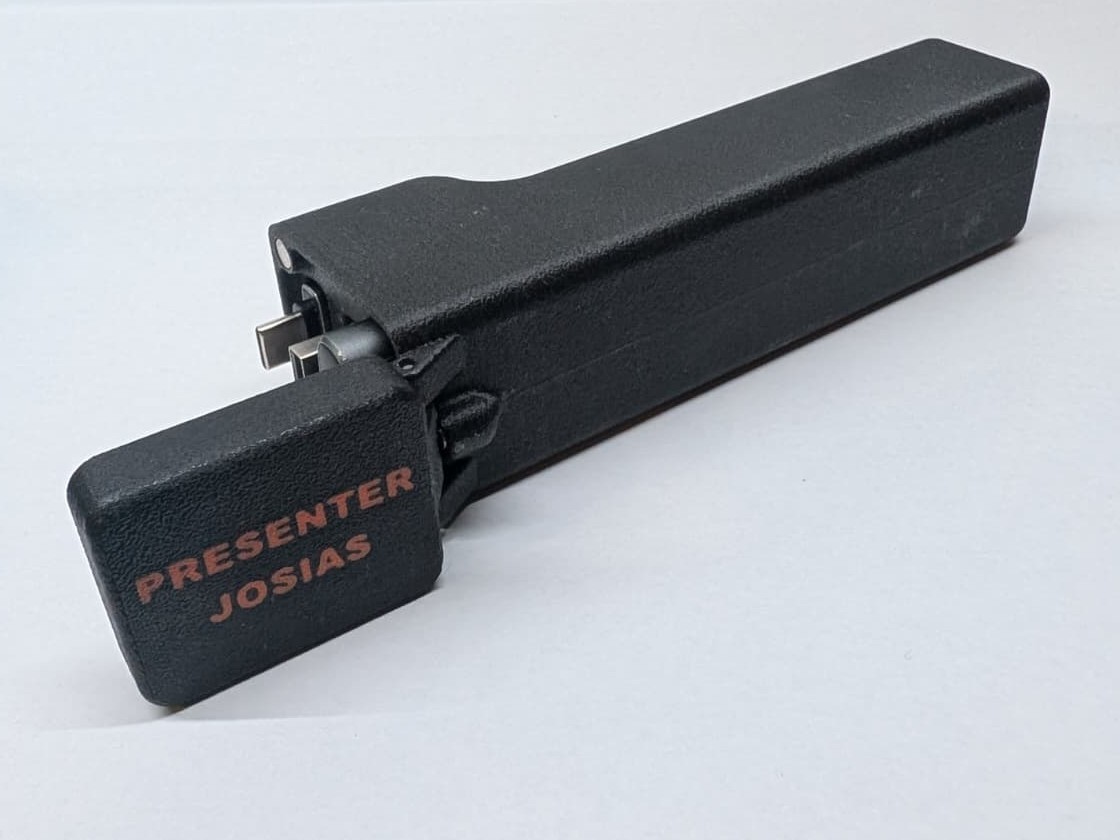
The lid is held shut by magnets, four in the lid and four in the body. There are additional magnets in the slots that hold the adapter and the charging cable, so nothing falls out when you open the case. In total, twelve magnets with 5 mm diameter and 2 mm height are built into the case.
Assembly
Material
- Body and lid from the 3D printer
- 12 magnets, 5 mm × 2 mm
- 1 stainless steel pin, 2 mm × 25 mm
- 1 ball spring plunger
- Superglue
- Some thin foam
- Hot air gun, for example from an SMD soldering station
Gluing in the magnets
All magnets are glued in with superglue. The rule here: rather too little glue than too much, otherwise it oozes out at the top and quickly looks ugly. Also, make sure to test the polarity before gluing, so that lid and body attract each other in the end and do not repel.
The magnets in the deep slots are a bit fiddly. The following trick has worked well for me: attach the magnet to a steel tool such as a knife or a spatula, put a small drop of glue on the magnet, guide it into the hole with the tool and press it down. As soon as the superglue has set, pull the tool away sideways, and the magnet stays in the hole.
Hinge
For the stainless steel pin and the ball spring plunger, I carefully heated the holes in the print with the hot air gun until the plastic reached its glass transition temperature and gave way a little. Then both parts can be pressed in cleanly and sit firmly after cooling, without any glue.
Foam
Finally, I glued some foam onto the inside of the lid. This way the closed lid presses lightly on the accessories and nothing can rattle or wobble anymore.
Build Your Own
I printed both parts from black GF ABS with a 0.15 mm layer height and no supports at all. The body standing upright, the lid lying on its top side. The lettering on the lid is printed in orange ABS.
The files for download are provided here without the name lettering and in a single color:
- Body as STL
- Lid as 3MF
- Complete Fusion 360 project, in case you want to adapt the case to your own presenter or accessories
The case is licensed under CC BY-NC-SA 4.0. This means you may build, modify and share it free of charge, as long as you credit me as the creator, do not use it commercially and share your own modifications under the same license.
If you have questions or need other file formats, feel free to write to me: loading …
Conclusion
A small but really practical project. Presenter, adapter and charging cable now have a fixed place and travel together in a sturdy case that can go into the backpack without worry. And thanks to the magnets, opening and closing the lid is fun every single time.